The code and method below has been updated to latest flutter as of Jan 15th, 2023.
When faced with the task of coming up with a re-usable “Animated Gradient” widget, I faced one problem, a gradient isn’t actually a widget - I can’t go and make an AnimatedWidget that I can use inside a BoxDecoration in my UI somewhere.
What I wanted was an actual gradient that simply took care of its own state management… not a widget, stateful or otherwise.
Enter Hooks
Since discovering hooks for flutter, I’ve become a huge fan, I’m making heavy use of hooks in my architecture, as shown in this post, and I find them particularly useful for use-cases such the one I’m about to outline below.
A hook is a new kind of object that encapsulates behaviour, keeping the state management out of your widget hierarchy. Hooks must be used within the build method of a Hook Widget, or within another hook. Hooks; combined with HookWidget, are a drop-in replacement for StatefulWidget and either enhance or replace other forms of state management you might be using.
For animation, hooks are particularly useful because they replace a huge swath of boilerplate and the need to create multiple classes - with just a couple of lines of code.
For this example we are going to make our own custom hook that itself contains a bunch of other hooks. We will be able to use our hook anywhere we might use a gradient.
Tutorial time!
Full source code is available at: https://github.com/paddo/flutter_animated_gradient
Fire up a terminal
flutter create animated_gradient
code animated_gradient
Open up pubspec.yaml, and add the flutter_hooks dependency, as below:
name: animated_gradient description: A new Flutter project.
publish_to: “none”
version: 1.0.0+1
environment: sdk: ”>=2.18.6
Let’s make a custom tween, and a custom hook
Since we are animating a gradient, we’ll need to make a tween for it.
Custom hooks are pretty easy to make. You can create a Hook class and a corresponding HookState. However, when using hooks within hooks, it’s best to just use a function.
The below code has changed, and is simplified compared to the original article in 2019.
import 'package:flutter/material.dart';
import 'package:flutter_hooks/flutter_hooks.dart';

Gradient useAnimatedGradient({
  Duration duration = const Duration(seconds: 5),
  required List<Gradient> gradients,
  Curve curve = Curves.linear,
}) {
  final controller = useAnimationController(duration: duration);
  final index = useValueNotifier(0);

  useEffect(() {
    controller.repeat();
    listener() {
      final newIndex = (controller.value * gradients.length).floor() % gradients.length;
      if (newIndex != index.value) index.value = newIndex;
    }

    controller.addListener(listener);
    return () => controller.removeListener(listener);
  }, [gradients, duration, curve]);

  return useAnimation(GradientTween(
    begin: gradients[index.value],
    end: gradients[(index.value + 1) % gradients.length],
  ).animate(CurvedAnimation(
      curve: Interval(
        index.value / gradients.length,
        (index.value + 1) / gradients.length,
        curve: curve,
      ),
      parent: controller)));
}

class GradientTween extends Tween<Gradient> {
  GradientTween({
    required Gradient begin,
    required Gradient end,
  }) : super(begin: begin, end: end);

  @override
  Gradient lerp(double t) => Gradient.lerp(begin, end, t)!;
}
Explainer time:
- Put simply, we have an animation on repeat, and based on where we are in that animation, we interpolate between 2 gradients, all of these interpolations join together (and cycle back to the start), to form one smooth sequence.
- Our hook implementation lives inside the “useAnimatedGradient” function.
- Our initialisation and tear-down code is in the useEffect hook. Here we attach a listener, which is responsible for selecting the pair of gradients that we are presently animating between, and the corresponding listener tear-down code. See useEffect docs.
- The useAnimationController hook takes care of all the boilerplate required for animations - the Ticker Mix-ins, initialisation code, disposal, etc.
- Since we do need some state information that survives between rebuilds (namely, the present position in the array of gradients), we use a useValueNotifier hook. We could’ve used useState (which forces a rebuild), but in our use-case, we don’t have to.
Using the hook
If you want to go and use it in your own project, you can use this hook with a list of gradients to cycle between. Use it anywhere you might use a gradient. Good luck!
For the sake of completeness though, and to bring this short sample to a conclusion, I’m going to make a widget to house our animation, so that we can encapsulate the state (and rebuilds) into as small a surface area as possible within the widget hierarchy.
Make a new file: lib/animated_gradient_box.dart
import 'package:animated_gradient/animated_gradient.dart';
import 'package:flutter/material.dart';
import 'package:flutter_hooks/flutter_hooks.dart';

class AnimatedGradientBox extends HookWidget {
  final List<Gradient> gradients;
  final Curve curve;

  const AnimatedGradientBox(this.gradients, {this.curve = Curves.linear, super.key});

  @override
  Widget build(BuildContext context) {
    return Container(
      decoration: BoxDecoration(
        gradient: useAnimatedGradient(gradients: gradients, curve: curve),
      ),
    );
  }
}
Now, layout a bunch of these boxes, and let the psychedelic adventures commence. Make lib/main.dart look like this:
import 'package:animated_gradient/animated_gradient_box.dart';
import 'package:flutter/material.dart';
void main() => runApp(const MyApp());
class MyApp extends StatelessWidget {
final List<Gradient> _linearGradients = const [
LinearGradient(
colors: [Colors.red, Colors.purple, Colors.blue, Colors.green, Colors.yellow],
begin: Alignment.centerLeft,
end: Alignment.centerRight,
),
LinearGradient(
colors: [Colors.red, Colors.purple, Colors.blue, Colors.green, Colors.yellow],
begin: Alignment.topCenter,
end: Alignment.bottomCenter,
),
LinearGradient(
colors: [Colors.red, Colors.purple, Colors.blue, Colors.green, Colors.yellow],
begin: Alignment.centerRight,
end: Alignment.centerLeft,
),
LinearGradient(
colors: [Colors.red, Colors.purple, Colors.blue, Colors.green, Colors.yellow],
begin: Alignment.bottomCenter,
end: Alignment.topCenter,
),
];
final List<Gradient> _sweepGradients = const [
SweepGradient(colors: [Colors.red, Colors.yellow, Colors.green, Colors.red]),
SweepGradient(colors: [Colors.lightBlue, Colors.purple, Colors.pink, Colors.lightBlue]),
];
final List<Gradient> _radialGradients = const [
RadialGradient(
colors: [Colors.red, Colors.blue],
radius: 1.0,
center: Alignment.topCenter,
),
RadialGradient(
colors: [Colors.lightBlue, Colors.purple, Colors.pink],
radius: 2.0,
center: Alignment.bottomCenter,
),
];
const MyApp({super.key});
@override
Widget build(BuildContext context) {
return MaterialApp(
debugShowCheckedModeBanner: false,
home: Scaffold(
body: OrientationBuilder(
builder: (context, orientation) => Flex(
crossAxisAlignment: CrossAxisAlignment.stretch,
direction: orientation == Orientation.portrait ? Axis.vertical : Axis.horizontal,
children: <Widget>[
Expanded(child: AnimatedGradientBox(_linearGradients)),
Expanded(child: AnimatedGradientBox(_sweepGradients)),
Expanded(child: AnimatedGradientBox(_radialGradients, curve: Curves.easeInOut)),
Expanded(child: AnimatedGradientBox([..._linearGradients, ..._radialGradients, ..._sweepGradients])),
],
),
),
),
);
}
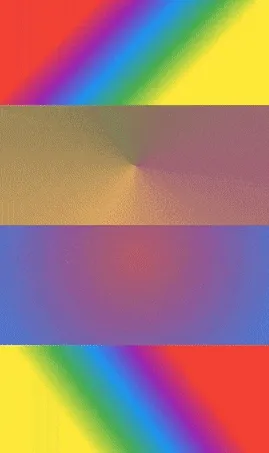
}Behold the amazing result!
Full source code is available at: https://github.com/paddo/flutter_animated_gradient
Related Posts